Static Website
Forms:
When using SimplyCDN as your deployment option, you don't have to use the additional forms integration in Simply Static -> Settings -> Forms.
Adding the form token (which you've done already) is enough to make it work 🙂
Thank you page:
I created a "Vielen Dank" page with Elementor and configured it as the "Thank you" page in Simply Static -> Settings -> Deployment -> SimplyCDN.
Once someone submits the contact form on your static website, he will get redirected to that page.
Feel free to modify it to your needs, I just wanted to make sure it's there.
Elementor Assets:
I also included the directories for Elementor, Elementor Pro, and Elementor Essential Addons in Simply Static -> Settings -> General -> Include, as I noticed upon the first export to SimplyCDN that there are a couple of CSS and JS files were missing.
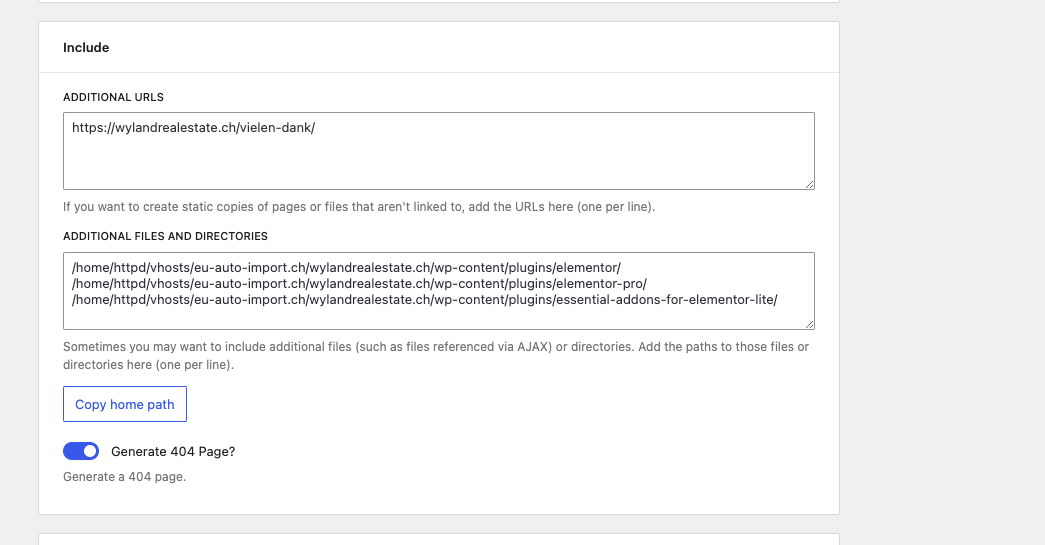
I kept the rest of the settings untouched.
WPRocket:
One small recommendation: You no longer need WPRocket when using Simply Static - I kept it active now, but it also seems to be caching the admin area, which makes configuring Simply Static a bit tricky.
If you decide that "Static" is for you, you no longer need it.
1) You create a new website at admin.kunde.com
2) You push the static site to SimplyCDN
3) You set the CNAME record to kunde.com
Now, give your customers access to admin.kunde.com to edit content, manage the site, etc.
From now on, it's a permanent staging environment - you can install and test new plugins, make updates, prepare landing pages, and so on.
Once you are happy with the results, you can switch to Simply Static and export the changes to the main domain.
Basic Auth:
We recommend (and most hosting providers have a simple UI to handle that) to protect the entire WordPress website with Basic Auth - this ensures that no one can access the website without a username and password.
You can then add the username and password in Simply Static -> Settings -> Misc -> Basic Auth:
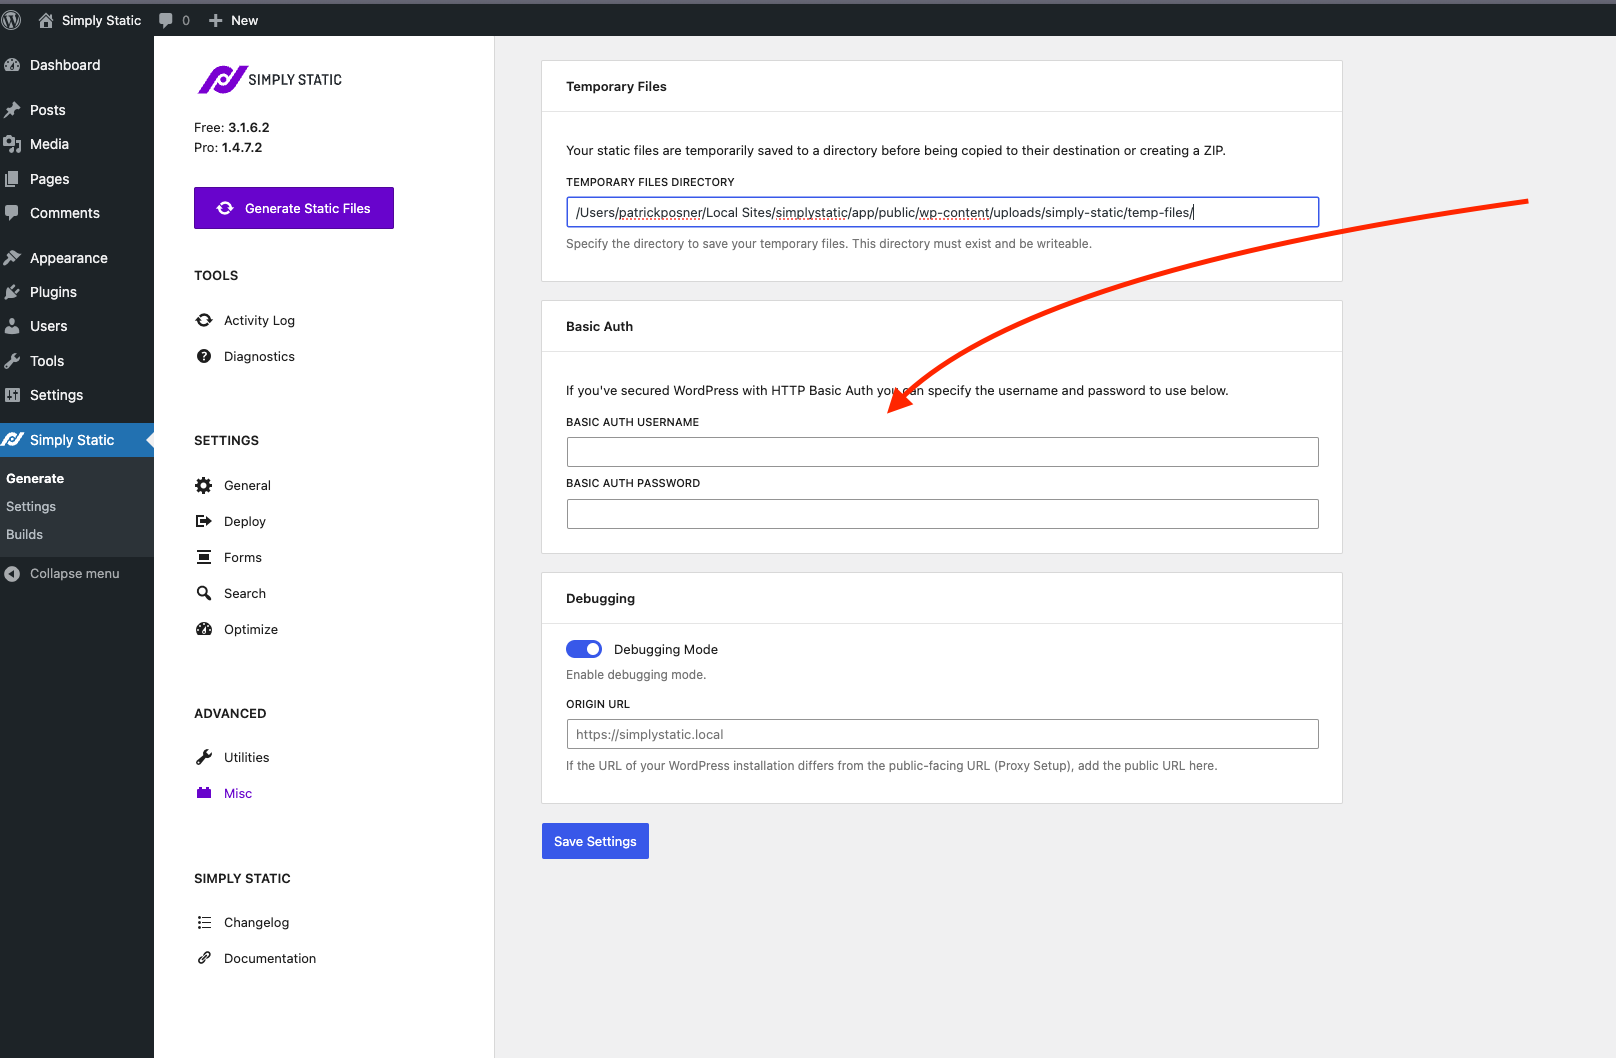
This way, Simply Static will authenticate before running a new static export, and you never have to expose the WP website to the public 🙂
Gravity Forms Ajax:
Ajax only works on traditional WP websites (as it permanently exchanges data between the website's front end and the WordPress admin area).
However, we are currently working on a "proxy" solution.
It embeds the form directly from your WordPress website into your static website by using a modernized (and responsive) version of an iFrame - that might also work for you, right?
While this isn't a problem in general, it hides the image path from the Simply Static crawler, and because of that, we couldn't extract them.
The same happened with the sliders here: https://wylandrealestate.ch/p
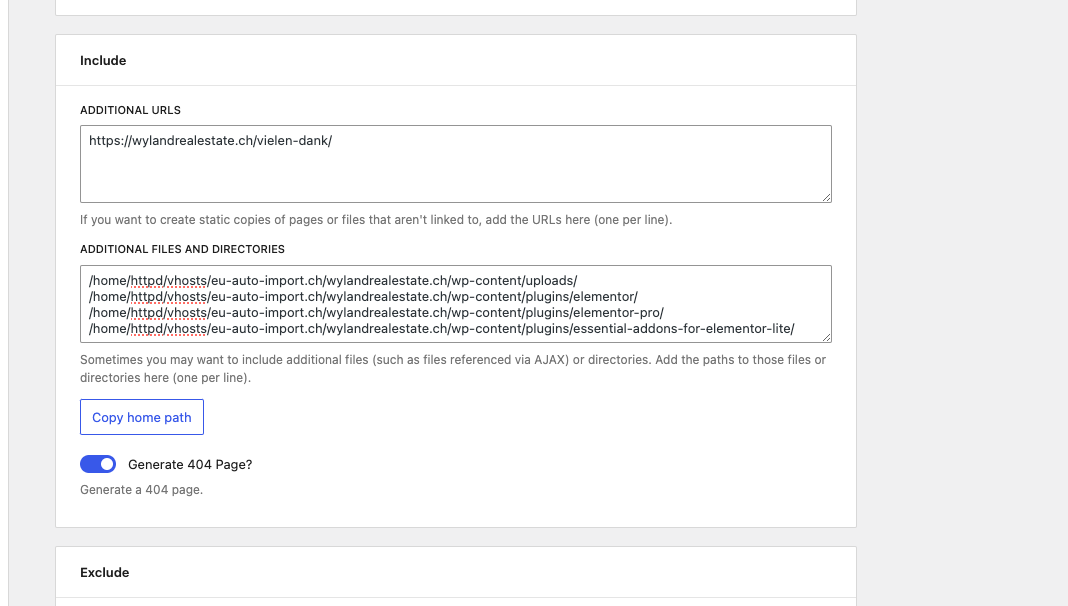
How to fix that:
While you could theoretically extend the crawler with a code snippet (for the technical nerds), most of the time, it's more convenient to add the uploads directory within the "Include" settings instead:
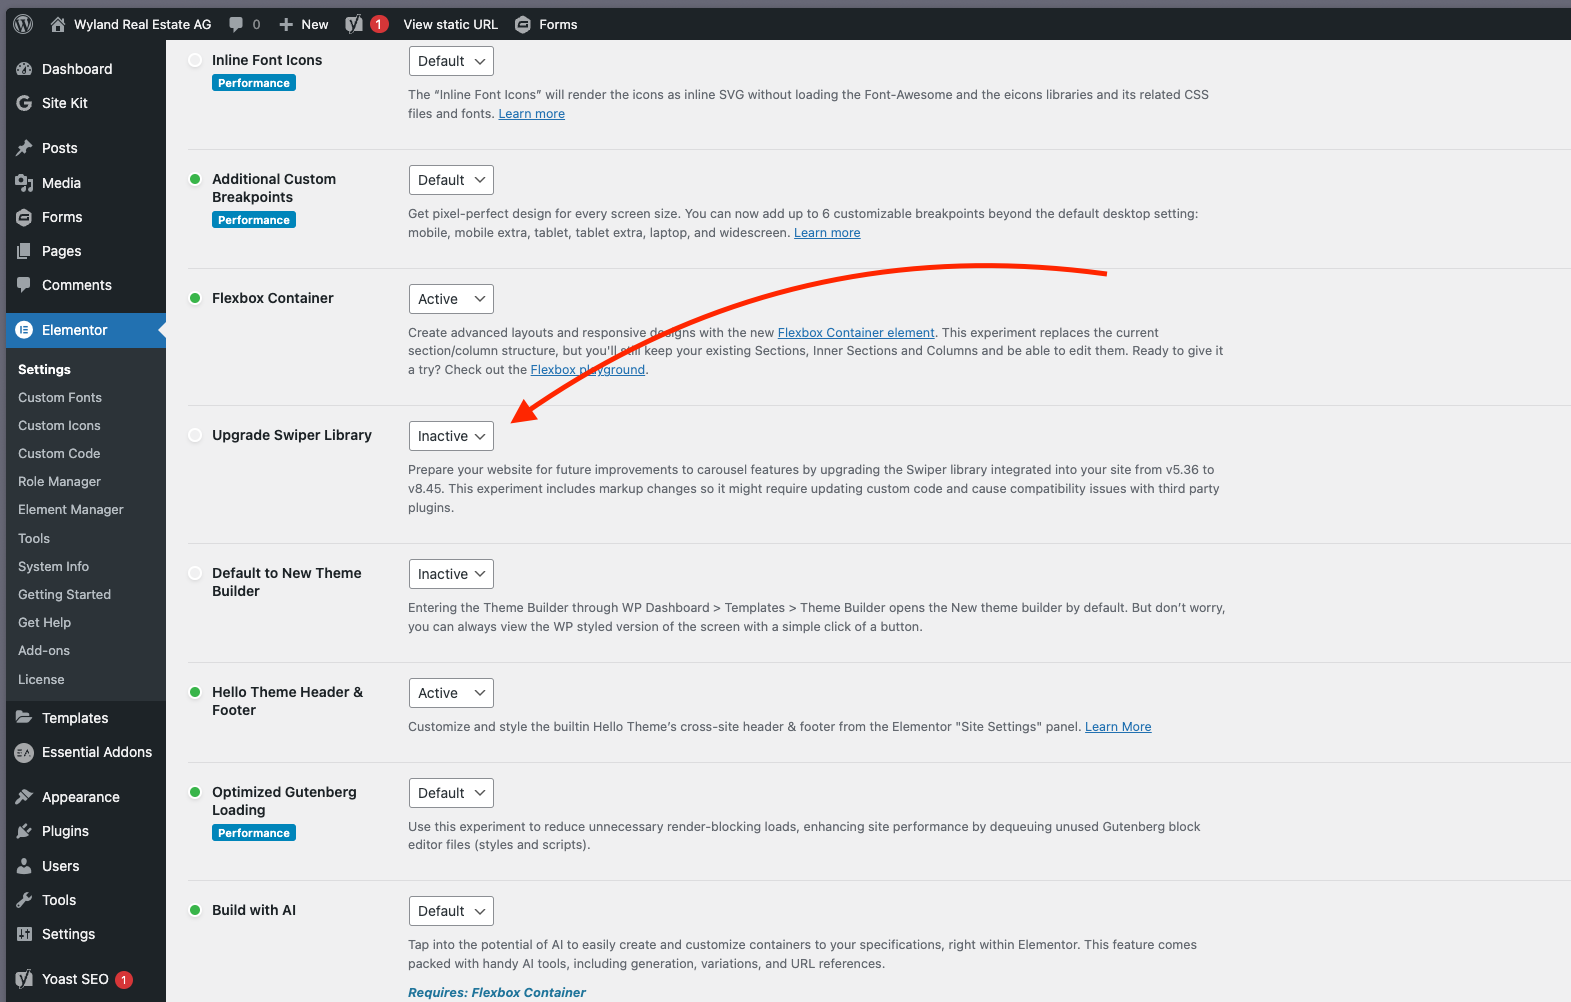
It's because the experimental version of the "Swiper" library isn't valid HTML (yet).
I disabled it now within the Elementor settings:
I assume this will work in future versions of the library without any extra steps, but right now, the "Swiper" library is considered beta, and I think "web standards" are not their number one priority.